Icinga2 is a feature-rich open-source network monitoring and alerting application that is a fork of the Nagios monitoring tool.
It was built to address the shortcomings of Nagios and introduce new features such as an improved and modern user interface, a REST API for integrating new extensions without the need for making changes to the Icinga core, and additional database connectors.
Icinga2 monitors the availability of hosts as well as services. Some of these services include SNMP, HTTP, HTTPS, and SSH. It also monitors network devices such as routers and switches.
Icinga also gathers metrics and generates logs to give you a complete picture of your network infrastructure. The logs and metrics are then visualized on dashboards to put everything into a better context.
In this article, we showcase how to install the Icinga2 monitoring application on RHEL, Rocky Linux, and AlmaLinux.
Prerequisites
As a requirement for installing Icinga2, you need to have the LAMP stack installed. A little caution here – Icinga2 requires PHP 7.3 and later versions for installation.
We already have a tutorial on how to install LAMP on RHEL 8 – Use this article to install the Apache webserver and MariaDB database server only since the instructions focus on installing PHP 7.2 which is not supported by Icinga2.
In the first step of this guide, we will walk you through the process of installing PHP 7.4 and the required modules.
Step 1: Install PHP and PHP Modules
With Apache and MariaDB installed, Let’s go ahead and install PHP 7.4. If you have PHP 7.2 and later versions installed, remove it by running:
$ sudo dnf remove php
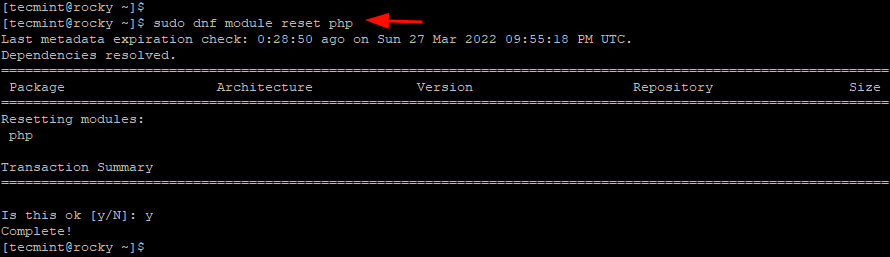
Next, reset the current PHP module on the system.
$ sudo dnf module reset php
After that, list the available PHP versions as shown.
$ sudo dnf module list php
Then enable PHP 7.4.
$ sudo dnf module enable php:7.4
Once the PHP 7.4 module has been enabled, Install PHP and the required PHP extensions.
$ sudo dnf install php-gd php-mbstring php-mysqlnd php-curl php-devel php-pear php-xml php-cli php-soap php-intl php-json php-ldap php-xmlrpc php-zip php-json php-common php-opcache php-gmp php-pgsql make -y
Icinga2 also requires the php-imagick extension. However, this cannot be installed conventionally as we did with the other PHP modules.
To install the extension, run the following commands:
$ dnf install -y ImageMagick ImageMagick-devel
$ sudo pecl install imagick
Then switch to the root user and append the extensions to the PHP.INI file.
$ su -
$ echo "extension=imagick.so" > /etc/php.d/20-imagick.ini
To apply the changes, restart the Apache webserver.
$ sudo systemctl restart httpd
Step 2: Install Icinga2 in RHEL 8
To install Icinga2, we need to add the Icinga repository since Icinga2 is not hosted on the AppStream repositories.
To do so, first, enable the EPEL repository.
$ sudo dnf -y install https://dl.fedoraproject.org/pub/epel/epel-release-latest-8.noarch.rpm
Next, enable the GPG signing key.
$ sudo rpm --import https://packages.icinga.com/icinga.key
Next, create a repository file in the /etc/yum.repos.d directory.
$ sudo vim /etc/yum.repos.d/icinga2.repo
Paste the following block of code
[icinga2]
name=Icinga 2 Repository for EPEL 8
baseurl=https://packages.icinga.com/epel/8/release
enabled=1
Save and exit the repository file. Then update the cache packages,
$ sudo dnf makecache
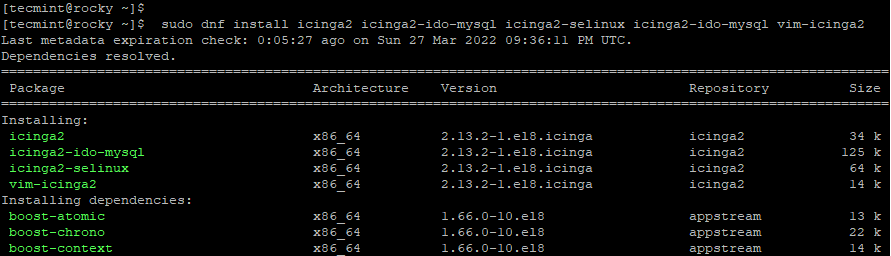
With the repository added, install the Icinga2 package and other associated Icinga2 packages.
$ sudo dnf install icinga2 icinga2-ido-mysql icinga2-selinux vim-icinga2 -y
Next, install Nagios plugins that will be used in monitoring both physical and virtual hosts.
$ sudo dnf install nagios-plugins-all -y
Next, enable the Icinga2 ido-mysql module and other features.
$ sudo icinga2 feature enable ido-mysql syslog command
Then restart Icinga for the changes to be applied.
$ sudo systemctl restart icinga2
Step 3: Create a Database for Icinga-IDO MySQL Module
The icinga2-IDO (Icinga Data Output) mysql feature is a backend feature that collates and exports all configuration and status information into a database. For this reason, we need to create a database for the Icinga2-ido-mysql feature.
So, log in to the MySQL database server:
$ sudo mysql -u root -p
Create a database as well as a database user for Icinga2. Then grant all privileges on the database user to the Icinga2 database.
> CREATE DATABASE icinga2;
> GRANT ALL PRIVILEGES ON icinga2.* TO 'icinga2_user'@'localhost' IDENTIFIED BY 'P@ssword321';
Apply the changes and exit the database server.
> FLUSH PRIVILEGES;
> EXIT;
Next, import the database schema as follows. You will be prompted for a password upon which you should provide the database password.
$ sudo mysql -u root -p icinga2 < /usr/share/icinga2-ido-mysql/schema/mysql.sql
Moving on, edit the ido-mysql configuration file.
$ sudo vim /etc/icinga2/features-available/ido-mysql.conf
Uncomment the database block and specify the database details.
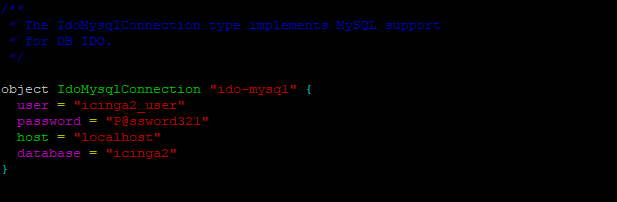
Save and exit.
Next, start and enable Icinga2.
$ sudo systemctl start icinga2
$ sudo systemctl enable icinga2
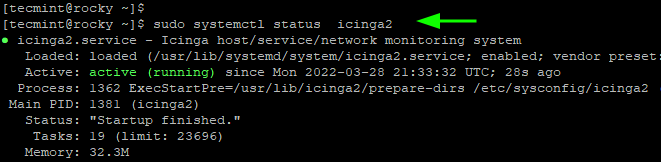
Then verify the status of Icinga2 as shown.
$ sudo systemctl status icinga2
From the output below, it’s clear that Icinga is up and running as expected.
Step 4: Install IcingaWeb2 on RHEL 8
IcingaWeb2 is an open-source web-based monitoring tool that also incorporates a command-line interface. It supports all the backend Icinga features such as Icinga-ido-mysql, Icinga core, Icinga2, and other modules.
To install IcingaWeb2, install PowerTools using the following command.
$ sudo dnf install 'dnf-command(config-manager)'
$ sudo dnf config-manager --set-enabled powertools
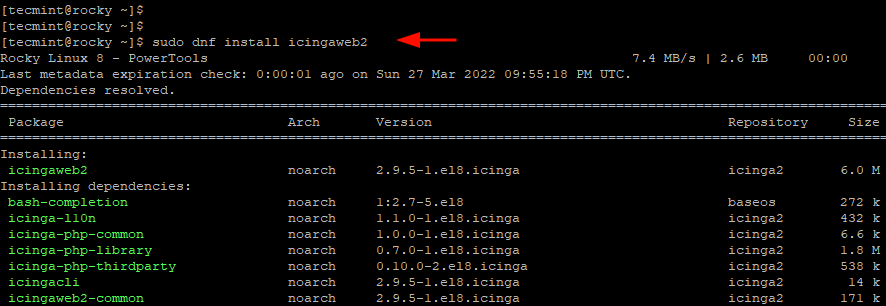
Once the installation is complete, install IcingaWeb2 and the CLI as shown.
$ sudo dnf install icingaweb2 icingacli
Step 5: Create a Database for IcingaWeb2
Just as we created a database schema for the Icinga2-IDO-mysql feature, we also need to create a second schema for Icinga Web2.
So, once again, log in to the database server.
$ sudo mysql -u root -p
Create a database and database user for IcingaWeb2 then grant all the permissions to the database user on the Icinga Web2 database.
> CREATE DATABASE icingaweb2;
> GRANT ALL ON icingaweb2.* TO icingaweb2@localhost IDENTIFIED BY 'P@ssword321';
Save the changes and exit.
> FLUSH PRIVILEGES;
> QUIT
When Icinga2 was installed, a new configuration file for Icinga2 was created. You can view it as shown.
$ cat /etc/httpd/conf.d/icingaweb2.conf
You need to restart the Apache webserver for the changes to kick in.
$ sudo systemctl restart httpd
Additionally, you also need to set SELinux mode to ‘permissive’ as follows.
$ sudo sed -i 's/^SELINUX=.*/SELINUX=permissive/g' /etc/selinux/config
Step 6: Complete Icinga2 Setup from Browser
The step in the installation of Icinga2 is the creation of a setup token, which is a unique code that will be used for authentication on the first step when setting up Icinga2 on a browser.
To generate a secret token, run the command:
$ sudo icingacli setup token create
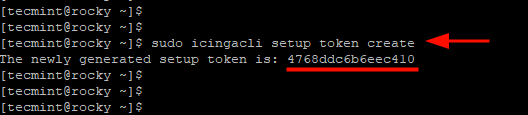
Copy and keep the setup token safe. If in the event you lose the token, you can retrieve it by running the command:
$ sudo icingacli setup token show
At this point in this guide, all the configurations are in check. What remains is to complete the installation from a web browser. To do this, browse the URL shown
http://server-ip/icingaweb2/setup
On the welcome page, paste the setup token that you generated earlier.
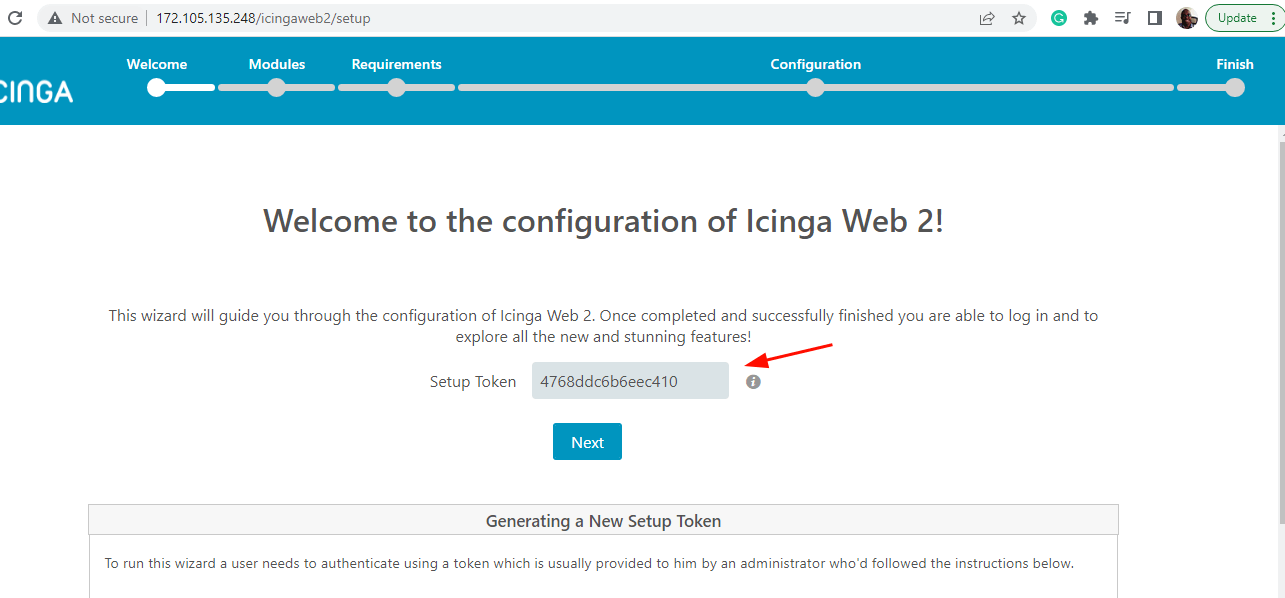
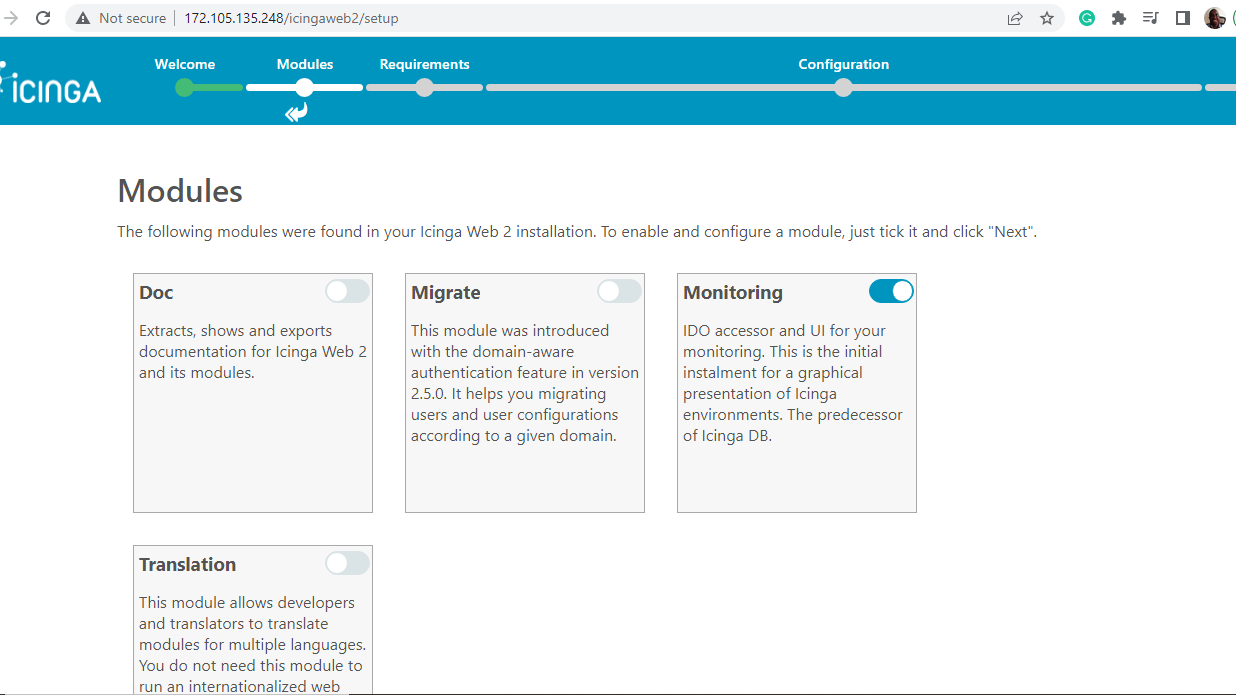
Once you have pasted the token, click ‘Next’ to continue. This takes you to the ‘Modules’ page. This provides an overview of all the modules that you can enable. By default, the ‘monitoring’ module is enabled.
Enable your preferred modules and scroll down and click ‘Next’ to continue.
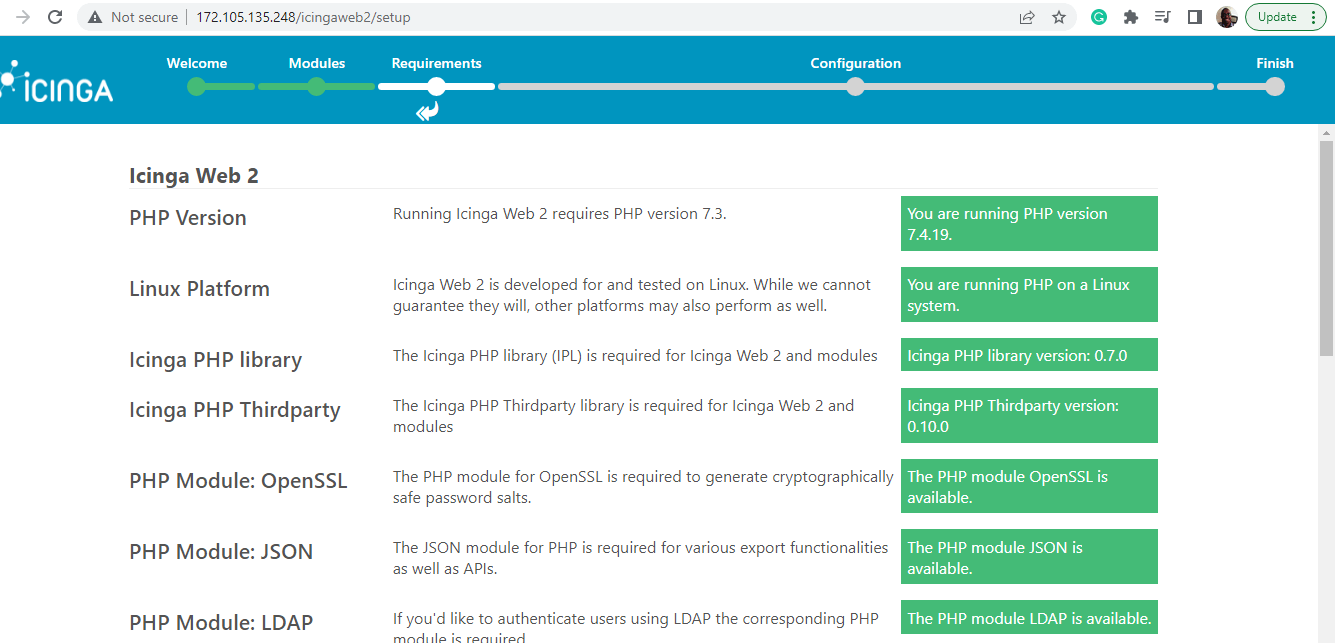
In this section, ensure that all the PHP prerequisites have been satisfied, which includes PHP modules, libraries, and directories. If all looks good, scroll down and click ‘Next’.
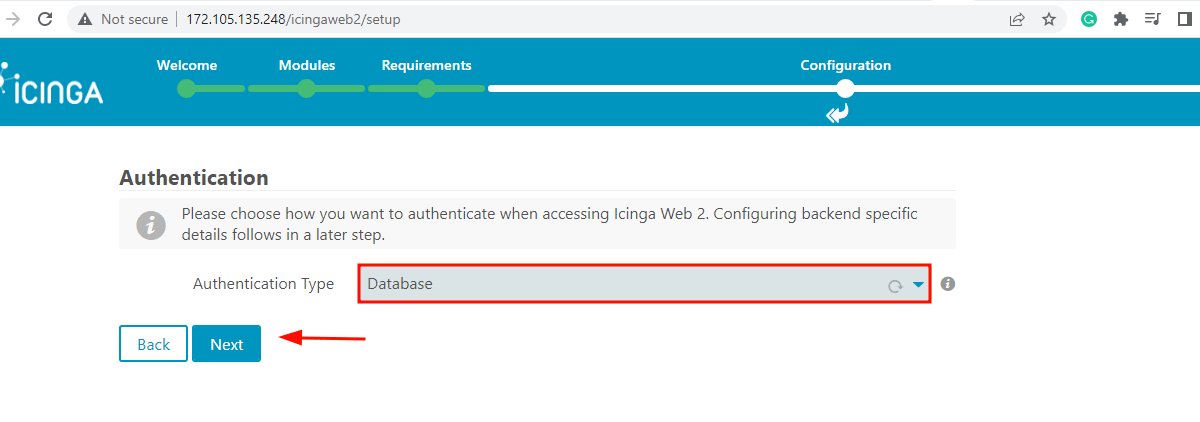
On the ‘Authentication’ page, leave everything as it is and click ‘Next’.
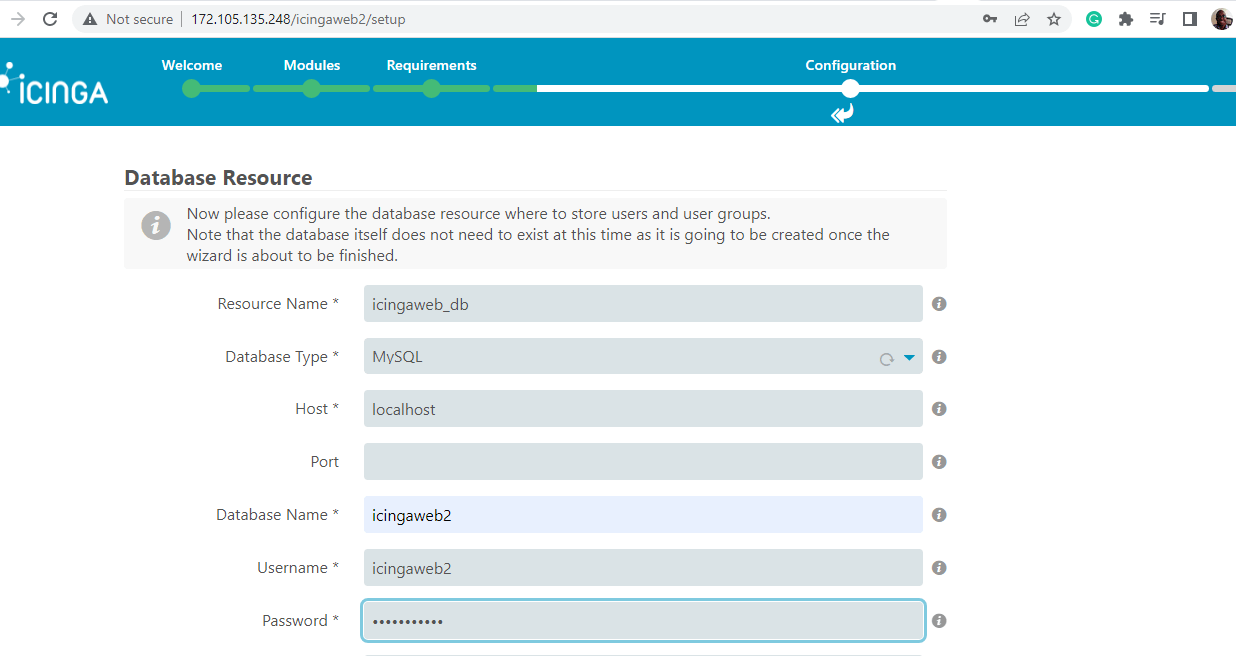
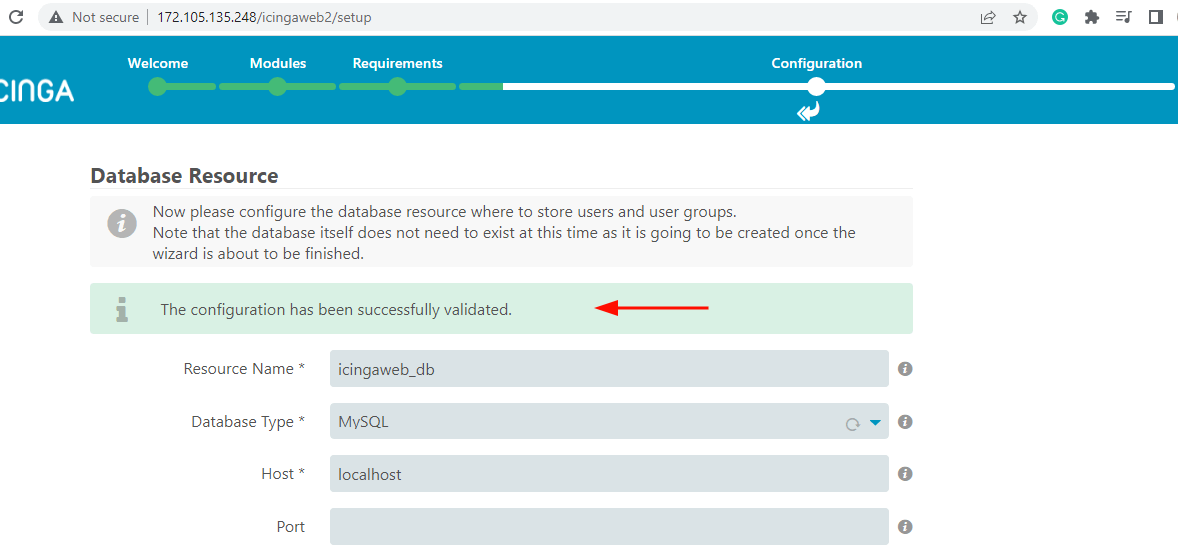
In the ‘Database Resource’ section, fill in the database details for IcingaWeb2 as specified in Step 5.
To confirm the database details are correct, scroll all the way down and click ‘Validate Configuration’.
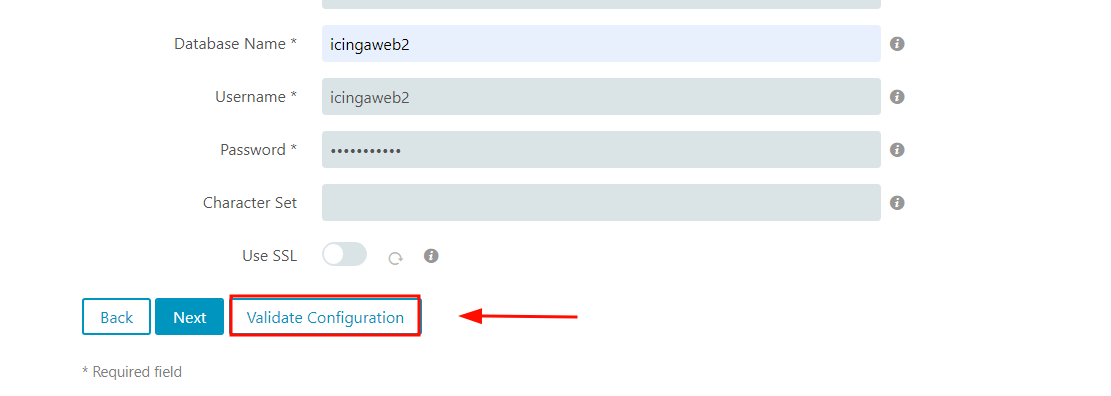
If all goes well, you should get a notification that the configuration was successfully validated.
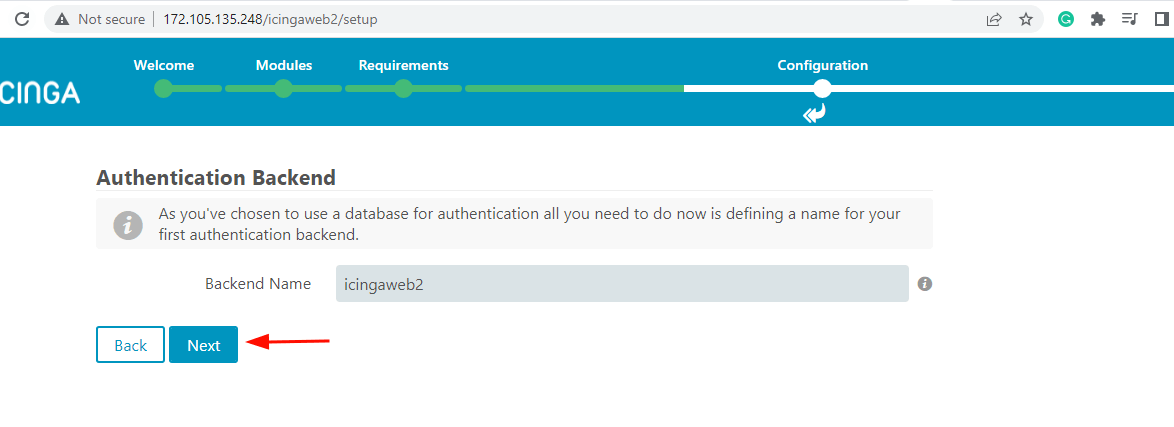
To head over to the next step, scroll down and click ‘Next’. For ‘Authentication Backend’ simply click ‘Next’ to accept the defaults.
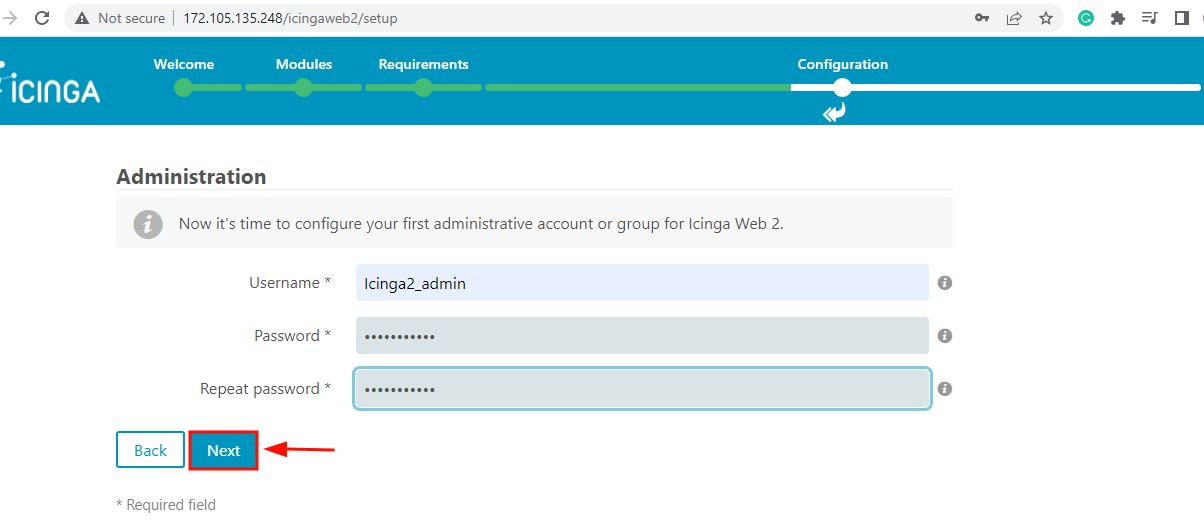
In the next step, create an Admin user that will be used to access and log into the Icinga2 web interface.
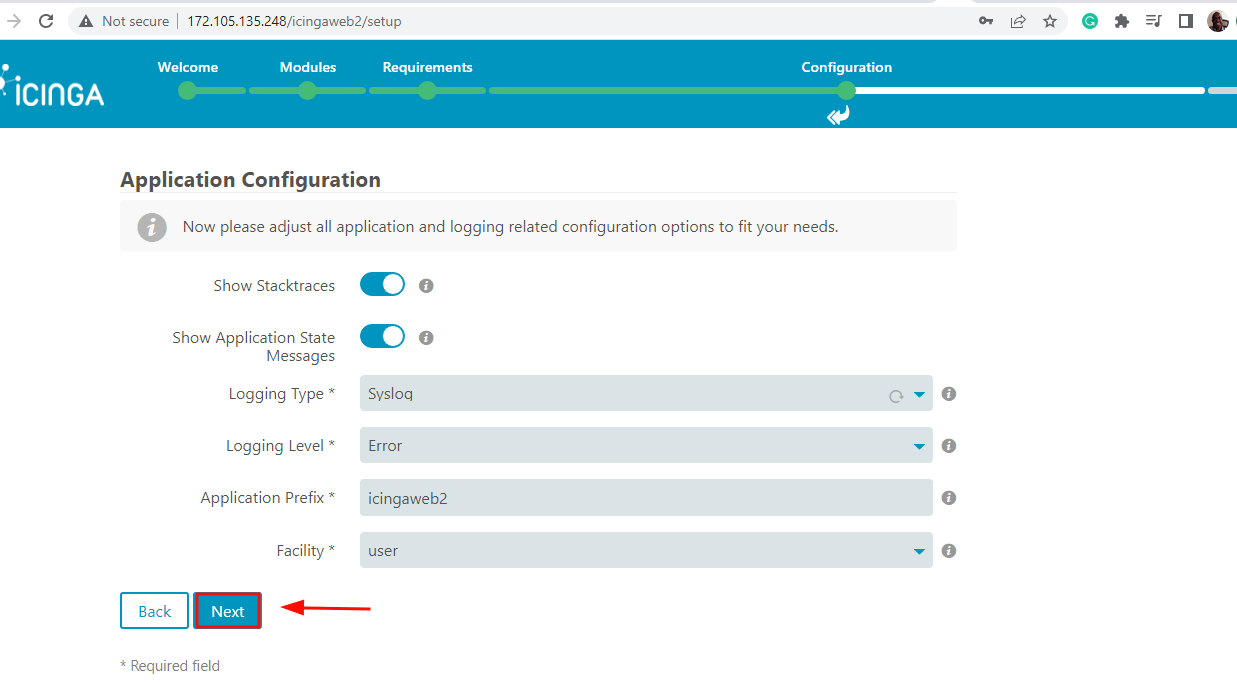
For the ‘Application monitoring’ section, accept the defaults and click ‘Next’.
Review all the changes that you have made so far along the way. If all looks good, click ‘Next’ and if you feel to make any changes, click ‘back’ and make the required changes.

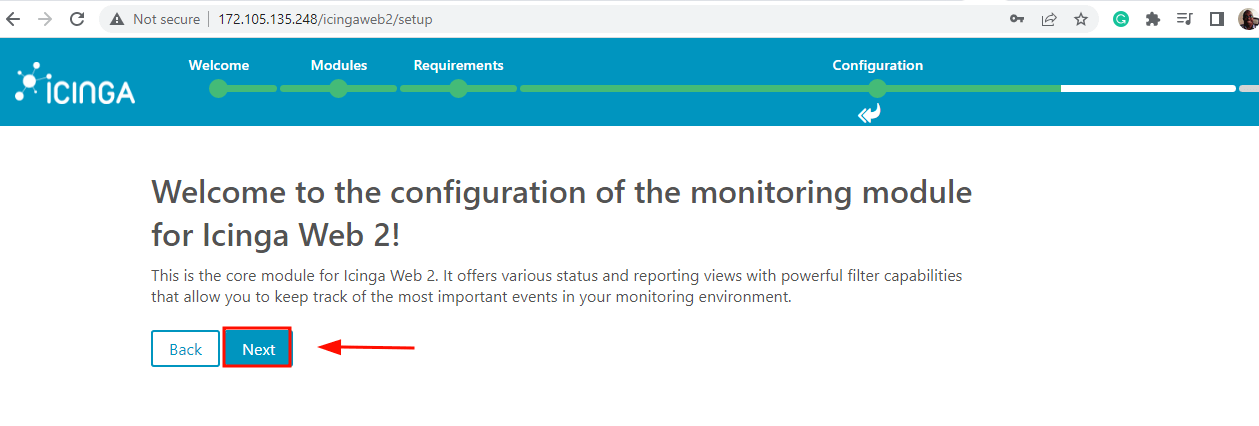
The next section is the configuration of the monitoring module for IcingaWeb2. This is the core module for Icinga Web 2 that offers status and reporting views with robust filter capabilities for tracking crucial events.
Click ‘Next’ to continue.
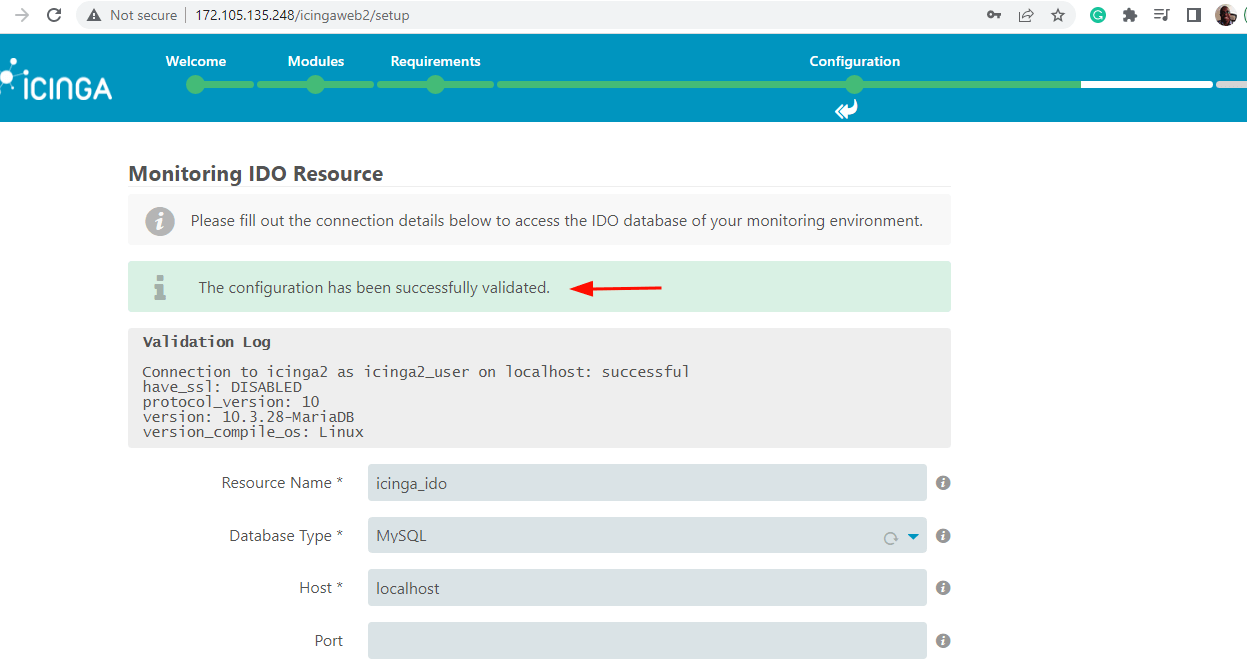
In the next step, fill out the form with the database details for the Icinga2-ido-mysql feature as specified in Step 3.

To validate the configuration, scroll down and click ‘Validate configuration’.

You will get the notification that the configuration was successfully validated.
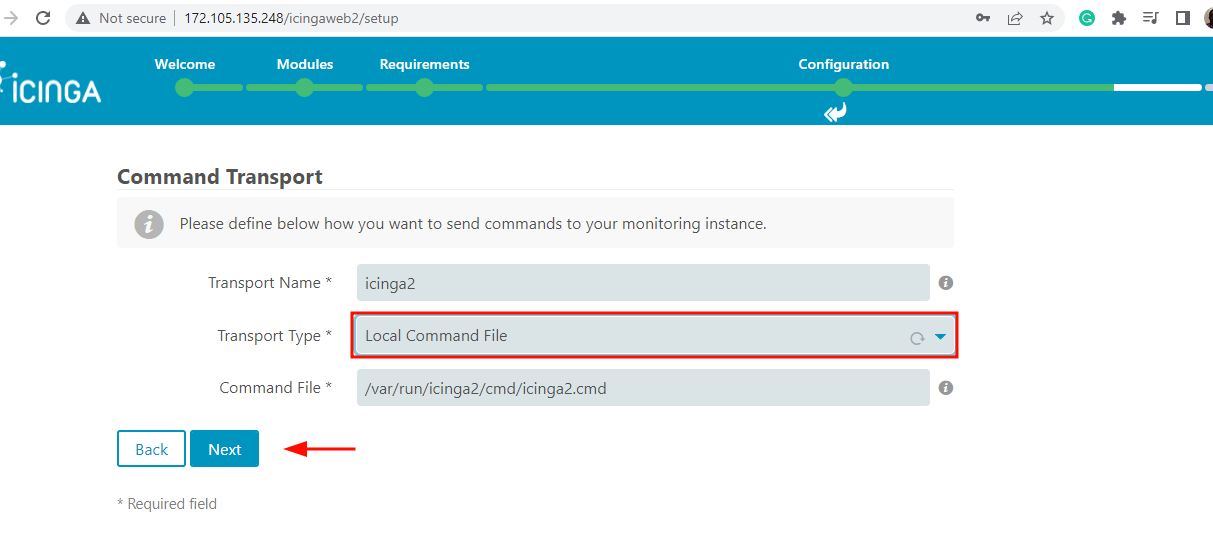
To proceed to the next step, scroll down and click ‘Next’. For ‘Command Transport’, use ‘Local Command File’ as the transport type and click ‘Next’.
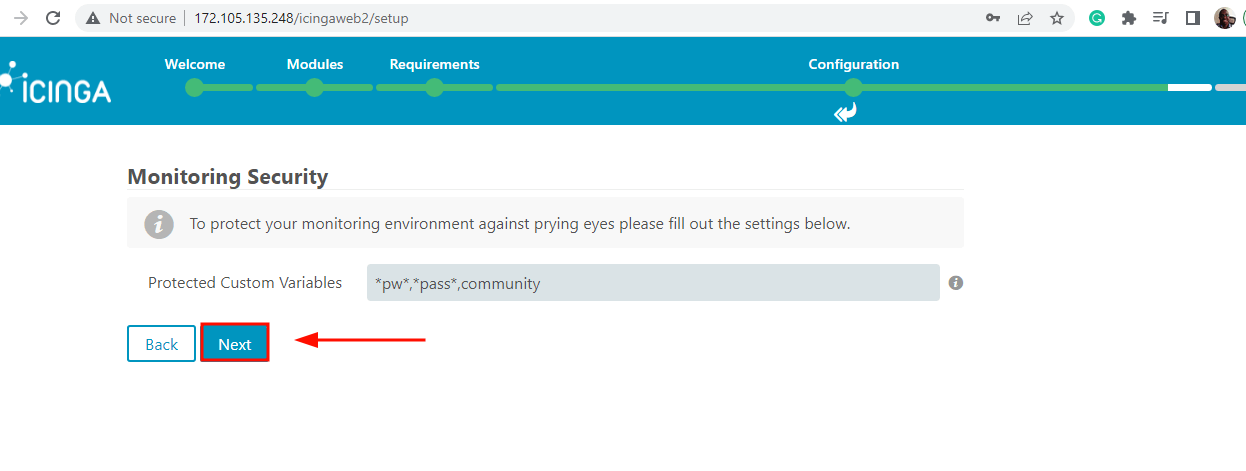
In the ‘Monitoring Security’ section, click ‘Next’.
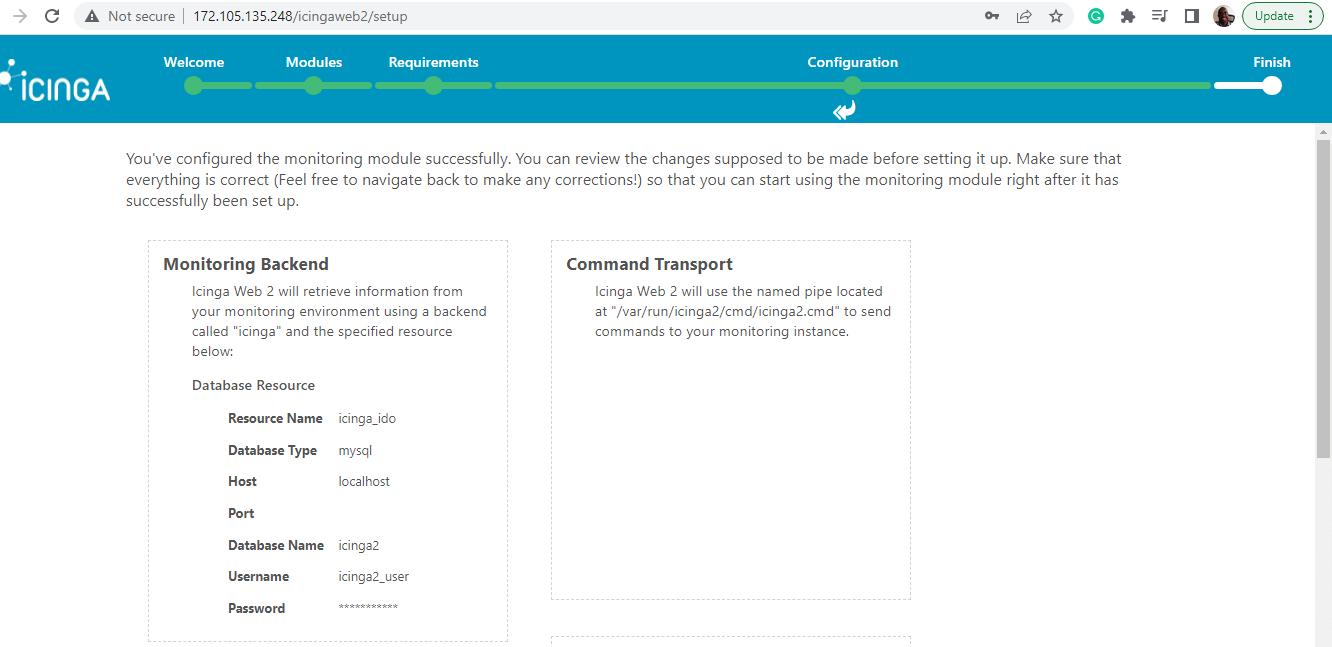
Once again, review all the configurations for the Icinga2 monitoring module. If all looks good, click ‘Finish’ otherwise head back and make the necessary changes.
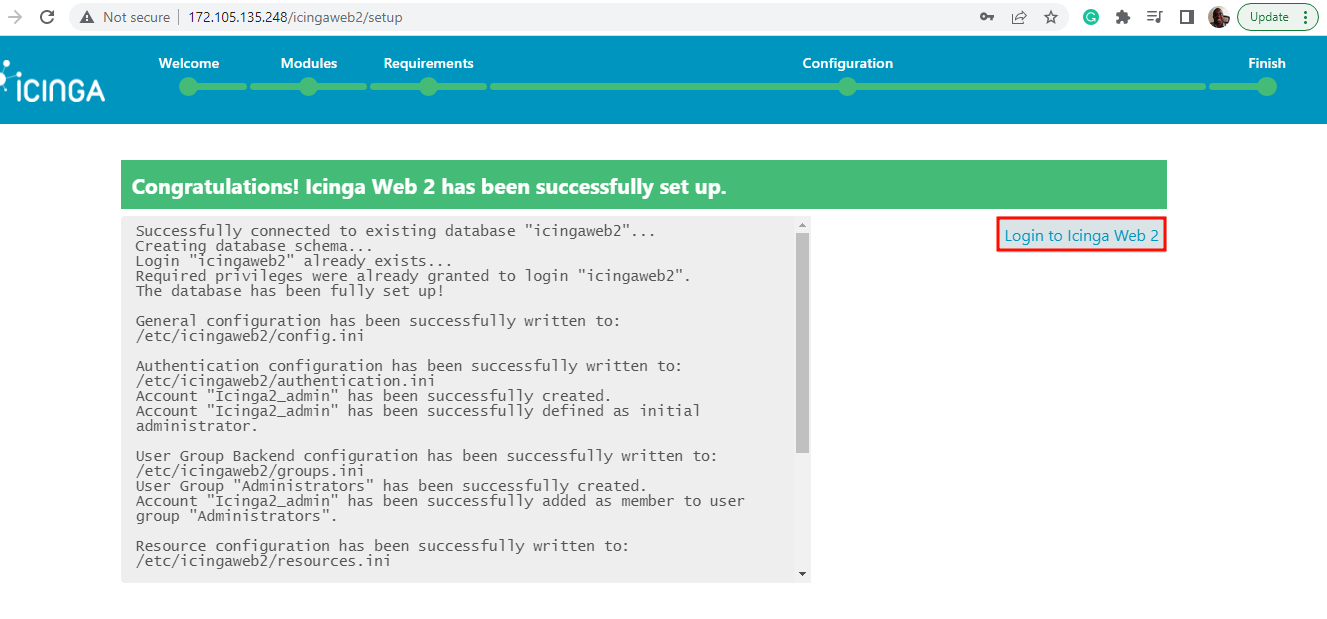
If all went well with the Icinga Web 2 setup, you should get a notification that Icinga Web 2 has been successfully set up. To log in to the web interface, click on the ‘Login to Icinga Web 2’ link.
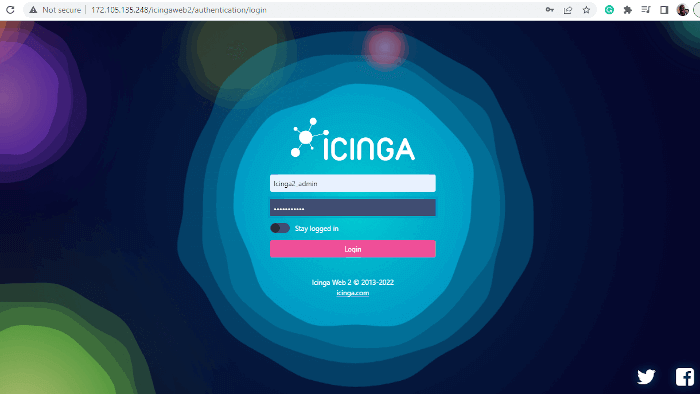
This pops open the Icinga Web 2 interface. Provide the Admin account details and click ‘login’.
This ushers you to the Icinga2 monitoring dashboard as shown.
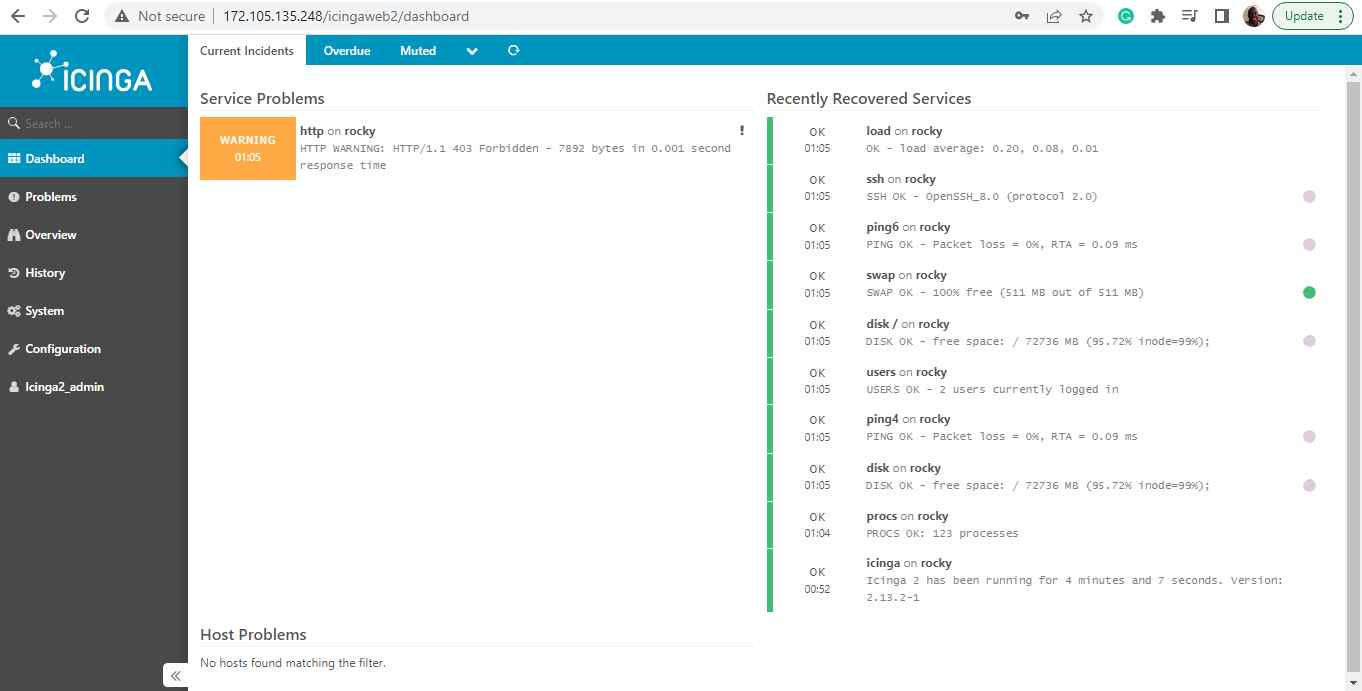
And that’s it. From there you can monitor various hosts and services within your network infrastructure. In this guide, we have walked you through the installation of Icinga Web 2 on RHEL 8, Rocky Linux, and AlmaLinux.


Please be aware of the fact that https://packages.icinga.com/epel/8/release will currently get no more updates as it is just the redirect to the centos8 releases and these releases are set out of life.