The last tutorial on Installing LAMP in Gentoo Linux just covered the basic installation process without additional settings available for Apache to better control your domains.

This tutorial is strictly connected with previous one on Gentoo LAMP and discusses extra settings for LAMP environment such as create Virtual Hosts on Apache, generate SSL Certificate files and Keys, enable secure SSL protocol on HTTP transactions and use Apache CGI Gateway so you can run Perl or Bash scripts over your website.
Requirements
Step 1: Create Apache Virtual Hosts
This topic uses a fake domain name – gentoo.lan – enabled through local hosts file, with website files served from /var/www/gentoo.lan – DocumentRoot directive, without a valid DNS record, to demonstrate how multiple Virtual Hosts can be enabled on Gentoo using Apache web Server.
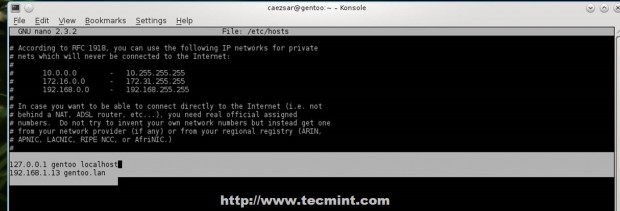
1. To begin, open Gentoo hosts file for editing and add a new line with your domain name.
$ sudo nano /etc/hosts
At the end of the file make it look similar to this.
127.0.0.1 localhost gentoo
192.168.1.13  gentoo.lan
2. Test your fake domain with ping command and the domain should respond with its IP address.
$ ping -c2 gentoo.lan

3. The process of activating Apache Virtual Hosts is quite simple. Just open Apache default virtual hosts file located on /etc/apache2/vhosts.d/ path and before last statement, enter your new Virtual Host definition enclosed under … directives. c
Containing your custom settings like ServerName and DocumentRoot path. Use the following file template as a guide for a new Virtual Host and include it on 00_default_vhost.conf file (for non-SSL websites).
$ sudo nano /etc/apache2/vhosts.d/00_default_vhost.conf
## Another Virtual hosts statemes ending in </VirtualHost> ###

<VirtualHost *:80>
        ServerName gentoo.lan
        DocumentRoot "/var/www/gentoo.lan"
                        <Directory "/var/www/gentoo.lan"
                Options Indexes FollowSymLinks ExecCGI MultiViews
         # AllowOverride controls what directives may be placed in .htaccess files.
                        AllowOverride All
        # Controls who can get stuff from this server file
                        Order allow,deny
                        Allow from all
        </Directory>
        <IfModule mpm_peruser_module>
                ServerEnvironment apache apache
        </IfModule>
</VirtualHost>

## Another Virtual hosts statemes ###
## LAST STATEMENT which closes virtual hosts file ##

</IfDefine>
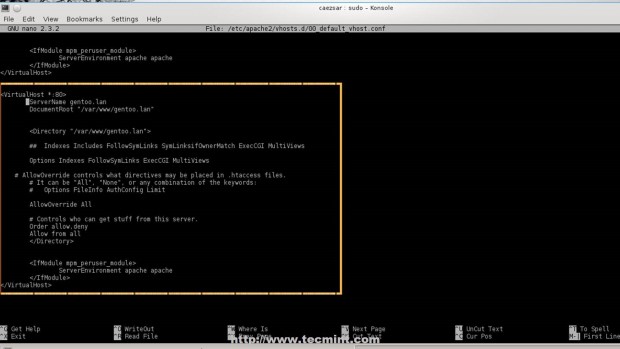
As you can see by visualizing this file content, the file is highly commented with explanations and also keeps localhost Virtual Host definition – which you can use it as a guide.
4. After finishing editing file with your custom Virtual Host, restart Apache to apply settings and make sure that you create DocumentRoot directory in case you have changed this directive and the path doesn’t exist by default ( in this case was changed to /var/www/gentoo.lan). I’ve also created a small PHP file to test webserver configurations.
$ sudo mkdir /var/www/gentoo.lan
$ su "echo '<?php phpinfo(); ?>' > /var/www/gentoo.lan/info.php"
$ sudo /etc/init.d/apache2 restart
5. To verify it, open a browser and point it your virtual domain name http://gentoo.lan/info.php.
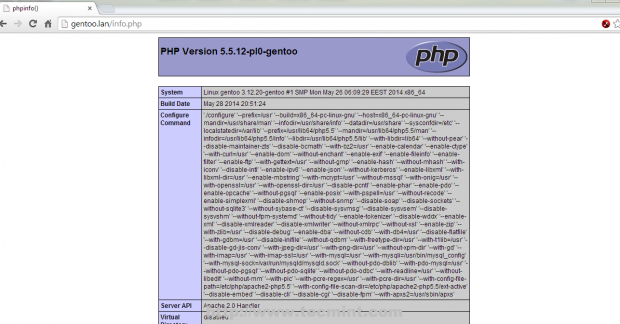
Using this procedure you can add as many non-SSL websites as you wish using Apache Virtual Hosts, but for a real Internet-facing machine assure that you have your domains registered and you use valid DNS server records.
To remove a Virtual Host just comment out or delete its directives enclosed under … on 00_default_vhost.conf file.
Step 2: Genereate SSL Certificates and Keys for Virtual Hosts
SSL is a cryptographic protocol used to exchange information over a secure communication channel in Internet or inside networks using Certificates and symmetric/asymmetric Keys.
6. To simplify Certificates and keys generation process use the following Bash script that acts as a command and automatically creates all you need with your SSL domain name settings.
First start by creating Bash script using the following command.
$ sudo nano /usr/local/bin/apache_gen_ssl
Add the following file content.
#!/bin/bash
mkdir /etc/apache2/ssl
cd /etc/apache2/ssl
echo -e "Enter a name for this certificate:\nEx: mydomain.lan"
read cert

openssl genpkey -algorithm RSA -pkeyopt rsa_keygen_bits:2048 -out $cert.key
chmod 600 $cert.key
openssl req -new -key $cert.key -out $cert.csr
openssl x509 -req -days 365 -in $cert.csr -signkey $cert.key -out $cert.crt

echo -e " The certificate $cert has been generated!\nPlease link it to Apache SSL website!"
ls -all /etc/apache2/ssl/
exit 0
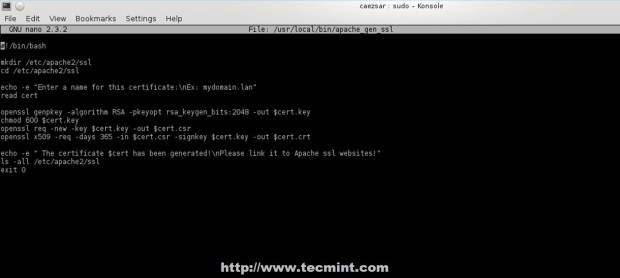
7. After the file has been created, append execute permissions on it and run it to generate SSL Keys and Certificates.
$ sudo chmod +x /usr/local/bin/apache_gen_ssl
$ sudo apache_gen_ssl
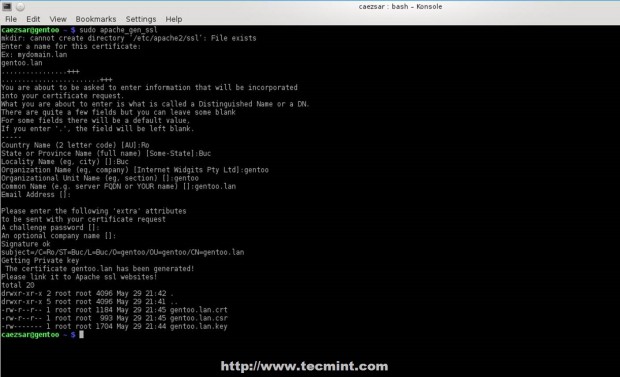
When you run it at the first time, will ask you to enter your domain name. Enter your domain name for which you generate SSL settings and fill Certificate with required information, the most important one, Common Name, use your server FQDN.
Default location where all your Certificates and Keys are hosted using this method is /etc/apache2/ssl/.
8. Now it’s time to create gentoo.lan Virtual Host SSL equivalent. Use the same method as for non-SSL Virtual Hosts but this time editing /etc/apache2/vhosts.d/00_default_ssl_vhosts.conf file with slightly changes.
First open file for editing and make the following changes.
$ sudo nano /etc/apache2/vhosts.d/00_default_ssl_vhosts.conf
Under Listen 443 directive add the following content.
NameVirtualHost *:443
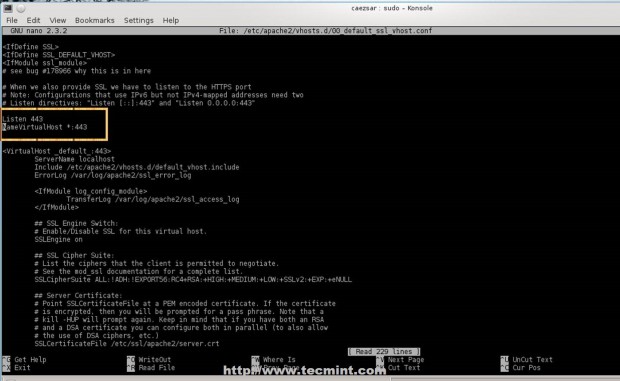
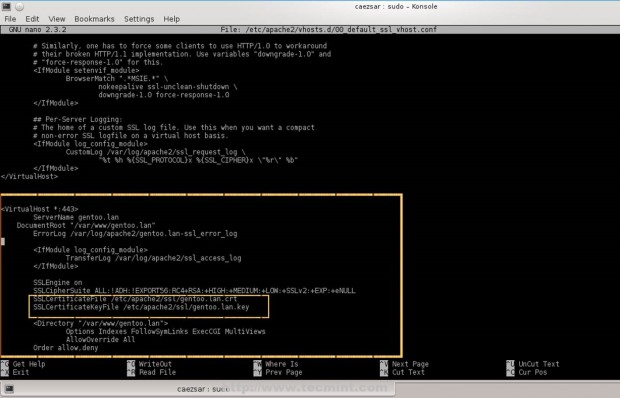
Use following template for a new Virtual Host and append new SSL Certificate + Key path and names.
## Another Virtual hosts statemes ending in </VirtualHost> ###

<VirtualHost *:443>
                ServerName gentoo.lan
    DocumentRoot "/var/www/gentoo.lan"
                ErrorLog /var/log/apache2/gentoo.lan-ssl_error_log
                <IfModule log_config_module>
                                TransferLog /var/log/apache2/gentoo.lan-ssl_access_log
                </IfModule>

                SSLEngine on
                SSLCipherSuite ALL:!ADH:!EXPORT56:RC4+RSA:+HIGH:+MEDIUM:+LOW:+SSLv2:+EXP:+eNULL

## Edit with new generated SSL certificate and key and change path to /etc/apache2/ssl/

		SSLCertificateFile /etc/apache2/ssl/gentoo.lan.crt
		SSLCertificateKeyFile /etc/apache2/ssl/gentoo.lan.key

                <Directory "/var/www/gentoo.lan">
                                Options Indexes FollowSymLinks ExecCGI MultiViews Includes
                                AllowOverride All
			        Order allow,deny
        			Allow from all
                </Directory>

                <FilesMatch "\.(cgi|shtml|phtml|php)$">
                                SSLOptions +StdEnvVars
                </FilesMatch>

                <Directory "/var/www/gentoo.lan ">
                                SSLOptions +StdEnvVars
                </Directory>

                <IfModule setenvif_module>
                                BrowserMatch ".*MSIE.*" \
                                                nokeepalive ssl-unclean-shutdown \
                                                downgrade-1.0 force-response-1.0
                </IfModule>

                <IfModule log_config_module>
                                CustomLog /var/log/apache2/ssl_request_log \
                                                "%t %h %{SSL_PROTOCOL}x %{SSL_CIPHER}x \"%r\" %b"
                </IfModule>
</VirtualHost>

## Another Virtual hosts statements ###
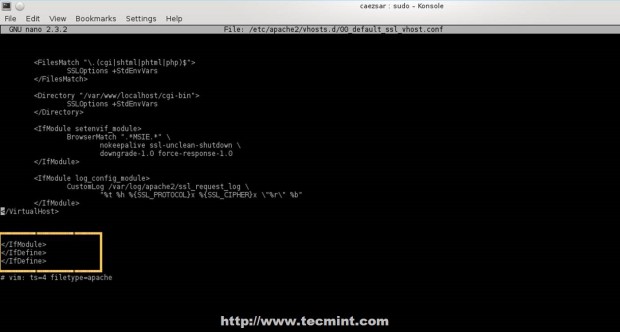
Virtual Hosts definitions must end before this last three statements.
</IfModule>
</IfDefine>
</IfDefine>
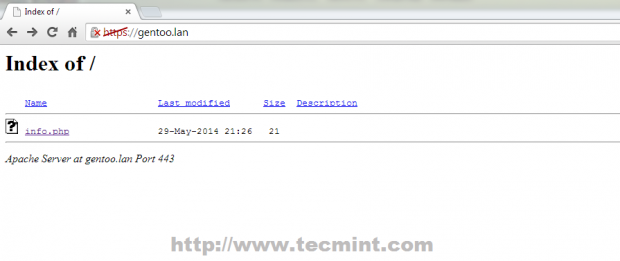
9. After finishing editing Virtual Host file, restart Apache service and direct your browser to your domain using HTTPS protocol https://gentoo.lan.
$ sudo /etc/init.d/apache2 restart
Using this procedure, you can add SSL websites with their own Certificates and Keys using Apache Virtual Hosts. To remove SSL Virtual Hosts comment out or delete its directives enclosed under … on /etc/apache2/vhosts.d/00_default_ssl_vhosts.conf file.
Step 3: Enable CGI Interface
The CGI (Common Gateway Interface) it allows Apache to interact with external programs, primary consisting in Perl or BASH scripts, which can add a dynamic content to your website.
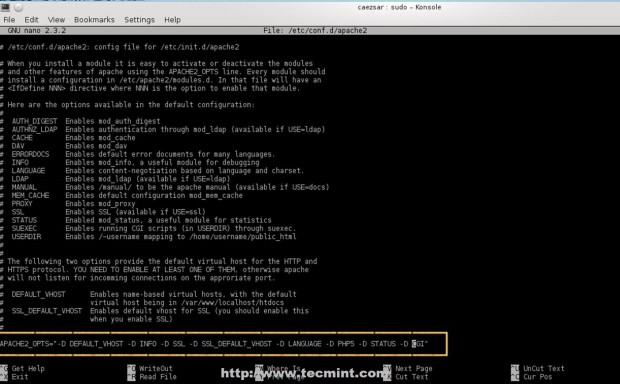
10. Before enabling CGI gateway make sure Apache was compiled with USE CGI modules flags support on Portage make.conf file: cgi cgid. To enable GCI support for Apache open /etc/conf.d/apache2 file and append CGI module on APACHE2_OPTS line.
$ sudo nano /etc/conf.d/apache2
Assure that this line has similar content.
APACHE2_OPTS="-D DEFAULT_VHOST -D INFO -D SSL -D SSL_DEFAULT_VHOST -D LANGUAGE -D STATUS -D CGI"
11. After CGI modules are enabled, open your website definition host you want to enable CGI interface and add the following content inside Virtual Host directives.
<Directory "/var/www/gentoo.lan">
	Options Indexes +ExecCGI MultiViews
        AddHandler cgi-script .cgi .pl
	DirectoryIndex index.cgi index.php index.html index.pl
        AllowOverride All
        Order allow,deny
        Allow from all
</Directory>
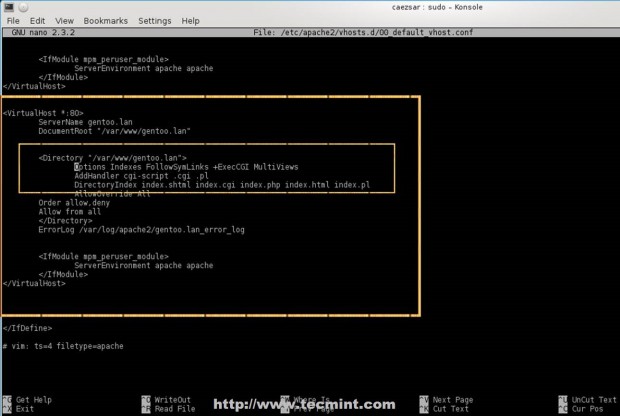
12. If you have a directory inside your DocumentRoot (/var/www/gentoo.lan/) path that holds CGI scripts you can enable just that directory to serve dynamic Perl or Bash scripts.
ScriptAlias /cgi-bin/ /var/www/gentoo.lan/cgi-bin/

<Location /cgi-bin>
                Options +ExecCGI
AddHandler cgi-script .cgi .pl
 DirectoryIndex index.cgi index.php index.html index.pl
</Location>
13. For SSI (Server Side Includes) append +Includes statement on Options and add .shtml file extension.
<Directory "/var/www/gentoo.lan">
                                Options Indexes +ExecCGI +Includes
                                AddHandler cgi-script .cgi .pl
                AddType text/html .shtml
AddOutputFilter INCLUDES .shtml
        DirectoryIndex index.shtml index.cgi index.pl index.php index.html
                AllowOverride All
                Order allow,deny
                Allow from all
</Directory>
14. To test some simple .cgi and .pl scripts on Apache CGI gateway create the following scripts inside you Virtual Host DocumentRoot (/var/www/gentoo.lan/).
Perl Script
$ sudo nano /var/www/gentoo.lan/env.pl
Add the following Perl content.
#!/usr/bin/perl
print "Content-type: text/html\n\n"; foreach my $keys (sort keys %ENV) { print "$keys =
$ENV{$keys}<br/>\n";
}
Bash Script
$ sudo nano /var/www/gentoo.lan/run.cgi
Add the following Bash content.
#!/bin/bash
echo "Content-type: text/html"
echo ""
echo "---------------------------------------------------------------------------------"
              ./env.pl
echo "---------------------------------------------------------------------------------"
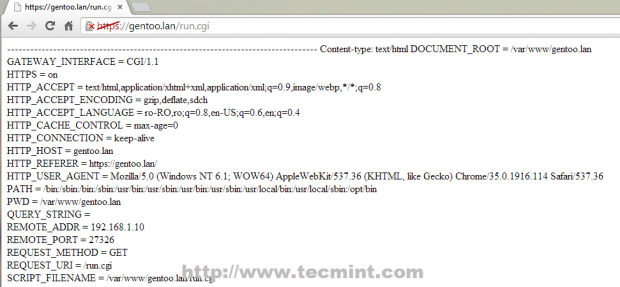
15. After the files have been created, make them executable, restart Apache daemon and point your browser to the following URLs.
$ sudo chmod +x /var/www/gentoo.lan/run.cgi
$ sudo chmod +x /var/www/gentoo.lan/env.pl
$ sudo /etc/init.d/apache2 restart
https://gentoo.lan/run.cgi

OR

https://gentoo.lan/env.pl
Now you can transform Gentoo into a powerful Web hosting platform with fine tuning settings for your system performance and maximum control over your entire environment.


